
 by Anthonny Quérouil
How to use accounts-ui with Elm and Meteor in 10 minutes
With Meteor you can quickly add an account management system using the packages accounts-ui and accounts-password. It is really useful for prototyping your application, before going deeper and creating your own design for the accounts management (login, register…). In this post we will see how to use these packages inside our Elm / Meteor application.
| If you want to play with the code, you can use my starter kit https://github.com/anthonny/meteor-elm-starter-kit. You will find details about this setup here |
git clone https://github.com/anthonny/meteor-elm-starter-kit.git meteor-elm-app
cd meteor-elm-app
meteor npm iAdd the accounts-ui widget in our app
The Meteor side
We will use the accounts-ui, the accounts-password and the jquery packages. So we will install the following elements:
# under meteor-elm-app
meteor add accounts-ui accounts-password jquery
meteor npm i jquery
Now we will be able to use the Template.loginButtons in our code to display the login form.
We want to manage the visibility of the form inside our Elm application.
A custom element is the perfect feature to do that, we will be able to use Html.node in Elm to work with it.
We can create a file imports/ui/accounts-ui.ts
import { Blaze } from 'meteor/blaze';
import { Template } from 'meteor/templating';

export class AccountsUi extends HTMLElement {
    view: Blaze.View;
    container: HTMLDivElement;
    constructor() {
        super();
        this.container = document.createElement('div');
        this.view = Blaze.render(Template.loginButtons, this.container);
    }
    connectedCallback() {
        this.appendChild(this.container);
    }
    disconnectedCallback() {
        if (this.view) {
            Blaze.remove(this.view);
        }
    }
}
And we can use it in the file client/main.ts and define a custom element called accounts-ui
import { AccountsUi } from '/imports/ui/accounts-ui';
import { init } from 'meteor/elm-app';
import { Meteor } from 'meteor/meteor';

customElements.define('accounts-ui', AccountsUi);

Meteor.startup(() => {
    const ports = init({
        node: document.getElementById('main'),
        flags: {},
    });
});
The Elm side
With the Html.node, it is really easy to use WebComponents inside your Elm application.
Lets modify our main file packages/elm-app/app/src/Main.elm
import Html exposing (Html, div, node, text)


view : Model -> Html msg
view model =
    div []
        [ node "accounts-ui" [] []
        , text model
        ]
We can now start our Meteor application meteor npm start and open http://localhost:3000
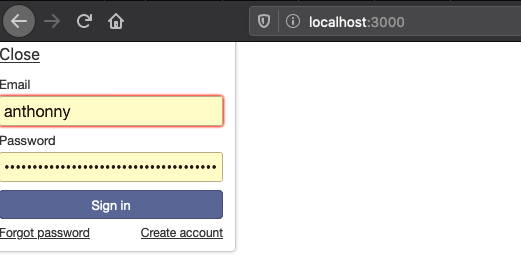
You should see the login form from accounts-ui:

And if your click on Sign in:
In maybe 5 minutes we have added the account management in our application. But we still need to inform our Elm application about the state of the authentication.
Manage the possible states
The Elm side
There are three states we need to handle:
-
when the user is logged in,
-
when the user is not logged in, anonymous,
-
when the user is logging in, it occurs when the application starts and when the user submit the login form.
So we can change our Model to:
type Model
    = LoggedIn String
    | LoggingIn
    | Anonymous
The LoggedIn state will have an associated String: the email of the current user.
Now we can adapt our view function:
view : Model -> Html msg
view model =
    div []
        [ node "accounts-ui" [] []
        , case model of
            Anonymous ->
                text "anonymous"

            LoggedIn email ->
                text <| "Hello " ++ email

            LoggingIn ->
                text "Logging in..."
        ]
Our code does not compile yet, we have to fix the init function. We have two possible states during the init phase:
-
Anonymous
-
LoggingIn
We can manage these states with a simple boolean isLoggingIn in our type Flags:
type alias Flags =
    { isLoggingIn : Bool
    }


main : Program Flags Model msg
main =
    Browser.element
        { init = init
        , view = view
        , update = update
        , subscriptions = subscriptions
        }


init : Flags -> ( Model, Cmd msg )
init flags =
    ( if flags.isLoggingIn then
        LoggingIn

      else
        Anonymous
    , Cmd.none
    )
The Meteor side
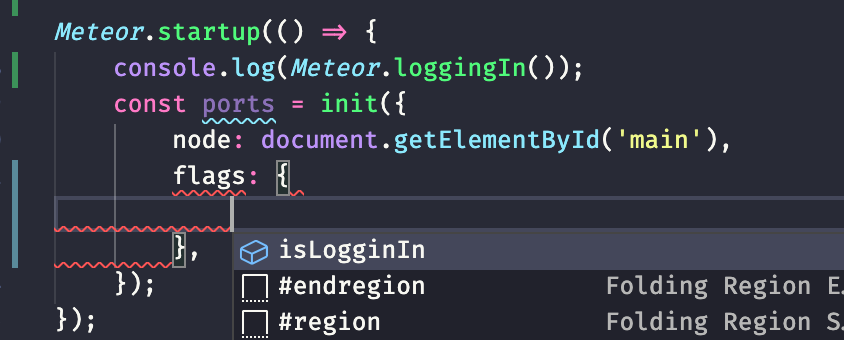
If you start the application meteor npm start, you should see this error:

The message is clear, we must define the isLoggingIn in our flags object.
We modify the interface Flags in the file index.ts:
interface Flags {
    isLoggingIn: boolean;
}
And we can use it in the client/main.ts:
Meteor.startup(() => {
const ports = init({
node: document.getElementById('main'),
flags: {
isLoggingIn: Meteor.loggingIn(),
},
});
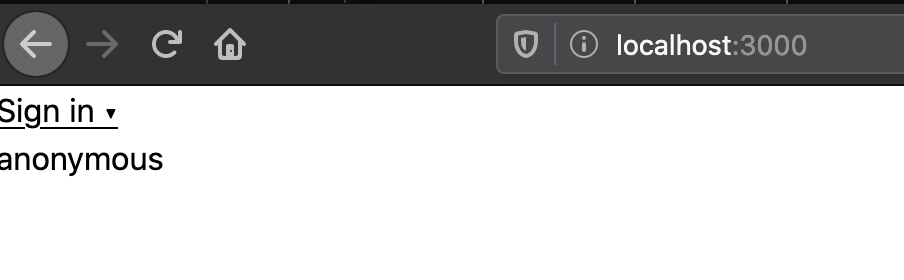
});You should see this content:
Synchronize the two applications
The Elm side
-
the user is logging in,
-
the user is logged in,
-
the user is logged out
In our file packages/elm-app/app/src/Main.elm, we will add three ports:
port loggingIn : (() -> msg) -> Sub msg


port loggedIn : (String -> msg) -> Sub msg


port loggedOut : (() -> msg) -> Sub msg
We will create three messages, one message per event
type Msg
    = GotLoggingIn
    | GotLoggedIn String
    | GotLoggedOut
And we have to adapt the update function and to define subscriptions:
update : Msg -> Model -> ( Model, Cmd Msg )
update msg model =
    case msg of
        GotLoggingIn ->
            ( LoggingIn, Cmd.none )

        GotLoggedIn email ->
            ( LoggedIn email, Cmd.none )

        GotLoggedOut ->
            ( Anonymous, Cmd.none )


subscriptions : Model -> Sub Msg
subscriptions _ =
    Sub.batch
        [ loggingIn (\_ -> GotLoggingIn)
        , loggedIn GotLoggedIn
        , loggedOut (\_ -> GotLoggedOut)
        ]
To finish we have to update the definition of our type Ports in packages/elm-app/:
export interface Ports {
    loggingIn?: {
        send: (nothing: null) => void;
    };
    loggedIn?: {
        send: (username: string) => void;
    };
    loggedOut?: {
        send: (nothing: null) => void;
    };
}
The Meteor side
On the Meteor side, we will use the function Tracker.autorun to send messages to the Elm application each time the state of the authentication changes.
// ...
import { Tracker } from 'meteor/tracker';

// ...
Meteor.startup(() => {
    const ports = init({
        node: document.getElementById('main'),
        flags: {
            isLoggingIn: Meteor.loggingIn(),
        },
    });

    Tracker.autorun(() => {
        if (Meteor.loggingIn()) {
            console.log('Loggind in...');
            ports.loggingIn?.send(null);
        } else if (Meteor.user()) {
            console.log('Connected');
            ports.loggedIn?.send(Meteor.user()?.emails?.[0].address || '');
        } else {
            console.log('Not connected');
            ports.loggedOut?.send(null);
        }
    });
});
Now you should see the state up-to-date in the Elm application when you play with the authentication.
Conclusion
With Meteor it is easy to add an account management system, thanks to accounts-ui and the combination of Elm with the Custom Elements makes the integration simple.
But I think that one day you will have to create your own UI for your forms (login, register…), luckily it will be the topic of my next post.
If you liked this post, do not hesitate to share it on your favorite social networks and if you are interested by this kind of content, you can follow me on twitter @anthonny_q.
If you have any feedbacks, comments are open 😘